




Short answer: A complete batch freezer cleaning routine is wash, rinse, sanitise, air dry, and dry reassembly. Clean every product-contact surface after each production shift, between flavour changes, and after allergens; then add a weekly deep clean of gaskets, spouts, seals, vents, and drainage areas. The routine should be written, timed, and signed by the person who closed the machine.
Most spoilage complaints do not begin with a visibly dirty machine. They begin with a warm gasket groove, a spout cap that still smells of mix, or a brush left in a bucket of cloudy sanitizer. The machine looks acceptable from the counter, then the next batch develops a sour edge or an odd aftertaste.
One missed groove can carry mint into vanilla. One missed allergen contact point can become a serious customer safety issue. A rushed cleaning routine can also create inspection findings, discarded product, emergency service calls, and staff confusion about who was responsible.
This protocol is for bakery owners, cafe and bubble tea operators, gelato shop founders, and home bakers moving into small-scale production. The goal is not a perfect-looking checklist. The goal is a repeatable shift routine that protects flavour, keeps equipment working, and gives an inspector a clear record.
What does a complete batch freezer cleaning routine look like?
A complete routine has three layers: between-batch control, end-of-shift cleaning, and weekly deep cleaning. The end-of-shift clean is the backbone. It covers every surface that touched mix or finished product, plus the hidden areas where residue collects after the bowl is emptied.
Flavour and allergen changes raise the standard. If mint runs before vanilla, or a peanut mix runs before a plain dairy mix, do a full wash-rinse-sanitise sequence on the product-contact path. Do not rely on a quick water purge unless the machine manual and local food code specifically allow it for that situation.
A workable shift routine follows this order:
- Stop production, lock out power where required, and confirm the machine cannot start.
- Remove remaining mix and disassemble the parts the manual allows staff to remove.
- Pre-rinse gross residue before it dries.
- Wash with a food-safe detergent and dedicated brushes.
- Rinse with potable water until foam and film are gone.
- Sanitise at the label concentration and contact time.
- Air dry on a clean rack, then reassemble with clean hands or gloves.
Every step needs an owner and a time window. “Clean the machine” is not a task. “Bowl 3 washed, rinsed, sanitised at 50-100 ppm chlorine, air dried, and logged by A. Patel at 21:10” is a task.
Batch freezer cleaning: daily versus weekly tasks
Daily cleaning removes the food residue that supports microbial growth. Weekly cleaning finds the residue that daily washing moves into crevices, hinge points, seal pockets, and small parts. Weekly work is additional, not a replacement for the daily sequence.
| Area | After each production shift | Weekly deep clean | Pass check |
|---|---|---|---|
| Bowl, dasher, and beater | Wash, rinse, and sanitise all product-contact surfaces. | Remove for inspection, check pits, cracks, worn edges, and trapped film. | No milk film, gritty feel, or sour smell when the part is warm. |
| Door, gasket, and hinge | Clean both faces, the groove, and the underside of the door. | Remove the gasket if the manual permits, then inspect for cuts and flattening. | The gasket seats without gaps and leaves no black residue on a clean cloth. |
| Draw spout, cap, and plunger | Disassemble, brush the bore, sanitise, and air dry. | Soak small parts, inspect springs and threads, and replace worn pieces. | No residue under the cap, behind the plunger, or inside the spout shoulder. |
| Mix inlet, vent, and air path | Flush and brush accessible ports until water runs clear. | Remove covers or fittings where approved and clean hidden contact areas. | The path is clear, odour-free, and free of dried mix. |
| Drip tray, drain, and floor | Empty, wash, sanitise, and leave dry. | Scrub the drain channel, check drainage slope, and clean the storage rack. | No standing water and no sour smell near the machine. |
| Cleaning tools and buckets | Rinse brushes, sanitise them, and store them dry and off the floor. | Inspect bristles, replace worn brushes, and clean the bucket and rack. | Brushes are not greasy, malodorous, or shared across incompatible tasks. |
For a multi-bowl machine, log each bowl separately. A GLACIO GB-Series machine may have 1 to 6 six-liter bowls, and one tick mark at the end of the shift can hide the bowl that was missed. Number the bowls physically and repeat that number on the cleaning log.
Wash, rinse, sanitise: temperatures and contact times
The order matters because detergent removes fat and protein, clean water removes detergent and loosened residue, and sanitizer reduces pathogens on a surface that is already clean. Sanitizer applied over milk film is largely wasted. The organic load consumes the active ingredient before it can do the job.
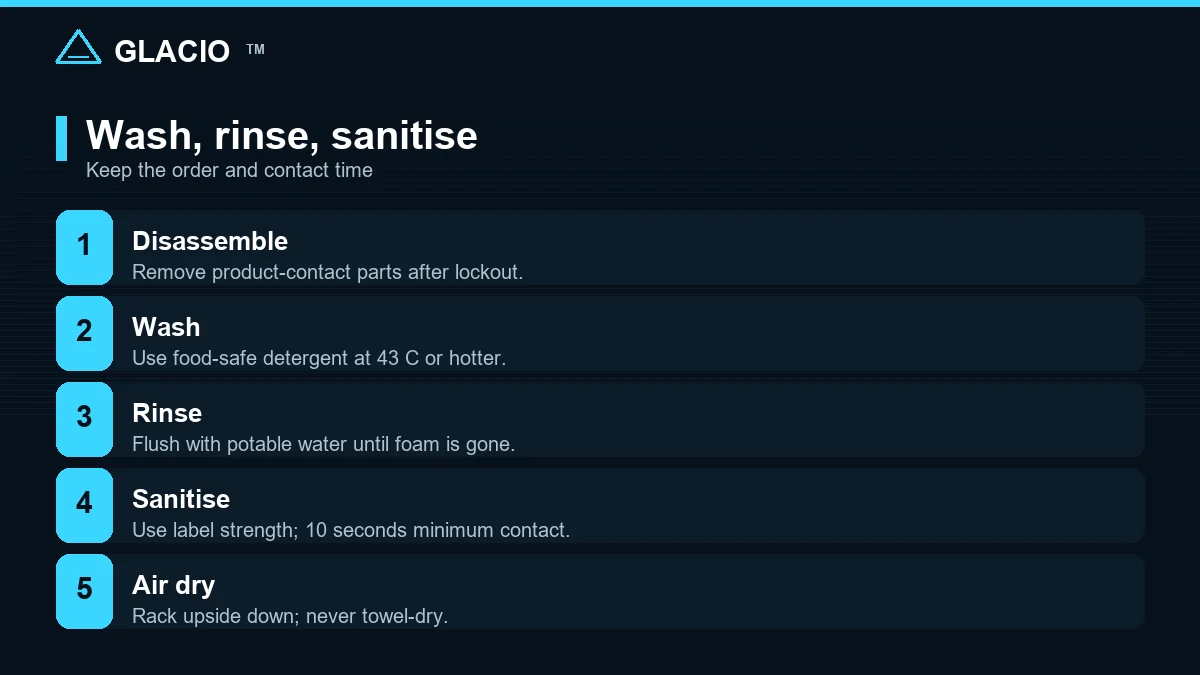
The sequence
- Pre-rinse: flush loose mix from the bowl and parts before it dries. Do not let parts sit overnight in a sink of warm mix.
- Wash: use potable water at 43 degrees C or hotter with a food-safe detergent, unless the detergent label says otherwise. Scrub the gasket groove, spout bore, shaft shoulders, and every seam with the correct brush.
- Rinse: use clean potable water until the surface feels slick-free and no foam remains. A cloudy rinse means more washing or more rinsing is needed.
- Sanitise: use the label concentration and contact time. Chlorine sanitizer for food-contact surfaces is commonly used at 50-100 ppm with at least 10 seconds contact, but your sanitizer label and local food code control the final number. For hot-water sanitising, general food-code practice is 77 degrees C for at least 30 seconds.
- Air dry: place parts on a clean rack so water can drain away. Do not towel-dry product-contact surfaces with a shared cloth.
- Reassemble: handle clean parts by non-contact areas, use only approved food-grade lubricant where the manual requires it, and confirm gaskets are seated correctly.
Contact time starts only after the entire surface is wet with sanitizer. Dipping a spout cap for 2 seconds and pulling it out does not meet a 10-second contact requirement. If a part floats above the solution, the exposed section is not being sanitised.
Test concentration with fresh strips rather than trusting a scoop or a smell. A weak solution may leave pathogens behind. An overly strong solution can leave chemical residue and stress rubber parts. Record the reading and the contact time on the shift log.
Temperature and chemical control
Wash water that is too cool leaves fat smeared across stainless steel. Water that is unnecessarily hot can make protein harder to remove and may not be safe for every rubber part. Use the hottest temperature allowed by the detergent and the machine manual, and keep the rinse water clean enough to carry residue away.
Never mix sanitizer with another chemical to make it stronger. Chlorine mixed with acid or ammonia products can create dangerous gases. Keep concentrated chemicals in labelled containers, store them away from food, and keep the safety data sheets where staff can reach them.
Which 5 parts do new staff always forget?
New staff usually clean what they can see from the front. Residue survives in the places that are awkward, removable, or hidden behind another part. Part names differ by model, so match each item to your manual and parts diagram before writing the SOP.
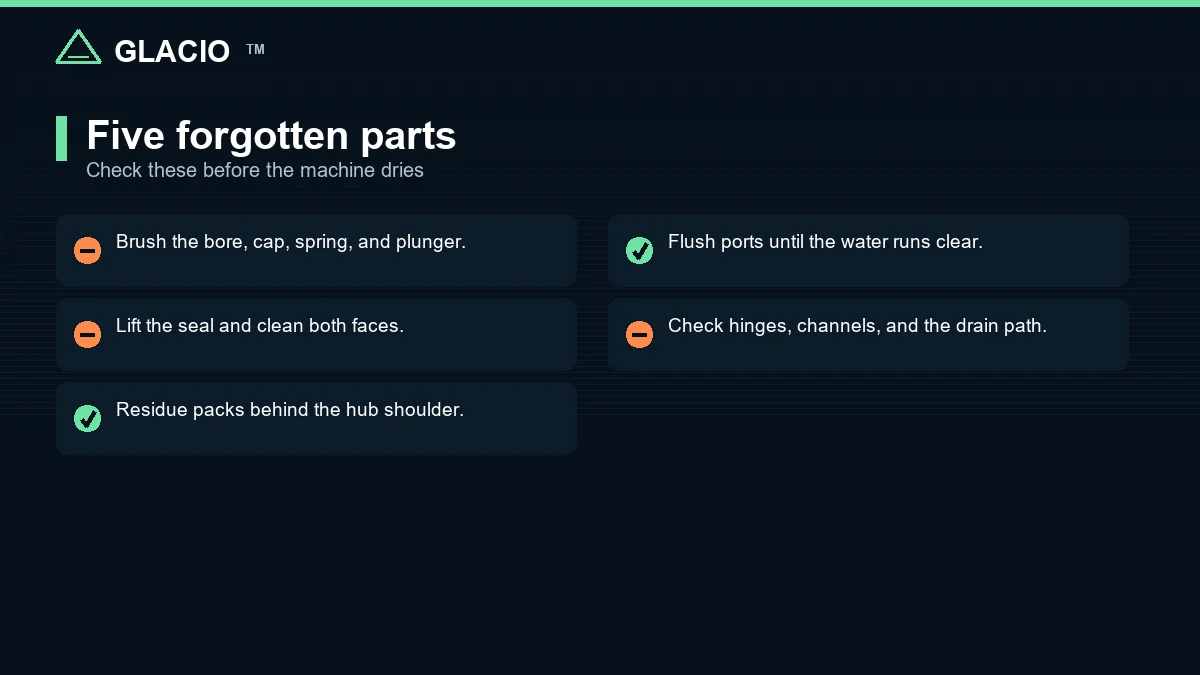
- The draw spout, cap, spring, and plunger: finished mix sits inside the spout after every draw. The bore, cap threads, spring, and back side of the plunger need bristle contact, not a quick rinse.
- The door gasket groove and door underside: the face of the gasket may look clean while milk film sits in the groove. Lift or remove the gasket only as the manual allows, and inspect the hinge side where drips collect.
- The dasher hub, shaft, and rear seal area: residue packs behind shoulders and around seal sleeves. If the seal area is not user-serviceable, clean the accessible surface and have a trained technician inspect it on the maintenance schedule.
- The mix inlet, vent, overflow port, and lid crevices: these paths move air and mix, so they also collect dried product. Flush until clear, brush accessible openings, and remove covers only when the manual permits.
- The lid underside and drip channel: condensation carries mix into channels and hinges. Wipe, wash, and sanitise the full drain path so liquid cannot sit and sour between shifts.
Use a clean white paper towel as a residue check before sanitising. Run it along a groove or lip. If the towel picks up a milky or greasy film, wash that area again. Discard the towel and do not use it to dry product-contact parts.
How does batch freezer cleaning affect flavour carry-over?
Batch freezer cleaning affects flavour because dairy fat, oils, particulates, and aromatic compounds cling to stainless steel, rubber, and plastic. Mint, coffee, cinnamon, smoke, peanut, and heavily spiced mixes are common offenders. A clean-looking machine can still carry a ghost note into the next batch.
Where carry-over hides
- Inside the draw spout, cap, and plunger assembly.
- In the door gasket groove and against the door face.
- Behind the dasher hub and around the rear seal area.
- Inside vents, mix inlets, overflow ports, and lid crevices.
- In worn brushes, shared cloths, and storage racks that touch clean parts.
Strong flavours need full disassembly, not a longer rinse. Rinsing with water moves oils around; detergent lifts them, and sanitizer reduces contamination on the now-clean surface. If the parts still smell of the previous flavour after sanitising and drying, repeat the wash step. Adding more sanitizer will not remove fat.
How to control carry-over
- Schedule light flavours before strong ones whenever the menu allows, but keep the full clean between flavour families.
- Use dedicated gaskets or small parts for major allergens if the machine design and budget allow.
- Inspect gasket grooves and spouts with a residue check before reassembly.
- If the manual permits a neutral purge after a strong flavour, treat it as an extra control, not a replacement for cleaning.
- Train staff to notice odour when parts are warm, because cold residue is less obvious.
Cleaning also affects texture and cycle time through assembly. A gasket seated incorrectly after cleaning can change air intake or draw, so the next bowl may look greasy or run long. A GLACIO GB-Series machine normally cycles a bowl in 15-20 minutes, and output depends on mix, starting temperature, ambient conditions, and the operating cycle. If every batch becomes slow only after a cleaning shift, inspect the assembly before blaming the recipe.
How do you make the SOP inspection-ready and train a shift?
An inspection-ready SOP is short enough to use during a busy close and specific enough to prove what happened. It names the machine, the bowl, the chemical concentration, the contact time, the person responsible, and the corrective action when a step fails.
- Keep a one-page laminated sequence at the machine with temperatures, concentrations, and contact times.
- Use colour-coded brushes for bowls, spouts, drains, and floors so tools do not cross between tasks.
- Train with a demonstration, then require a return demonstration from every new operator.
- Record each bowl separately on multi-bowl machines.
- Keep sanitizer test strips beside the log, not locked in an office.
- Audit one close per week and correct the first missed step before it becomes a habit.
Your gelato machine cleaning schedule should distinguish between end-of-shift work and weekly deep work. Staff can handle most of it, but gasket removal, seal inspection, and internal service items should be assigned to someone trained for that task. Use the commercial ice cream machine maintenance checklist to decide what belongs in the weekly routine and what belongs with a technician.
For staff training, build the lesson around the actual close, not a classroom slide. The one-shift staff training SOP can help you turn the cleaning sequence into an opening and closing routine with clear handoffs.
What the cleaning log needs
Record the date, shift, machine, bowl number, detergent, sanitizer concentration, contact time, drying check, staff initials, and any corrective action. Add a short note when a part is replaced or when a seal is inspected by a technician. Food safety for ice cream equipment depends on evidence, not memory.
What goes wrong when cleaning is rushed?
Rushed cleaning usually fails in predictable ways. The operator skips a rinse, guesses the sanitizer dose, reassembles wet parts, or uses one brush for the spout and the floor. The machine may pass a quick visual check and still fail the next batch.
| Failure | What you notice | Likely cause | Correction |
|---|---|---|---|
| No clean rinse | Cloudy film, slick feel, weak sanitizer reading | Detergent and milk solids left on the surface | Wash again, rinse until clear, then sanitise. |
| Sanitizer guessed by eye | Chemical smell or no measurable reading | Wrong dilution or exhausted solution | Mix fresh solution and verify with strips. |
| Parts reassembled wet | Sour smell, biofilm in crevices, spotting | Water trapped behind gaskets and caps | Air dry fully on a clean rack before assembly. |
| One brush for everything | Allergen or flavour complaints after a clean | Cross-contact through tools and buckets | Use colour-coded brushes and clean storage. |
| Skipped gasket removal | Mint, coffee, or milk residue returns | Residue packed in the groove and hinge side | Deep clean at the approved interval and replace worn seals. |
If the machine still runs long, draws soft, or makes uneven product after a correct clean, move to mechanical diagnosis. The batch freezer not freezing troubleshooting guide covers the likely causes before you call a technician.
Do not let cleaning become a punishment for the closing crew. Give them enough time, the right tools, and a supervisor who checks the first few closes. A 15-minute routine done properly is cheaper than a lost day of production.
Frequently asked questions
How often should I clean a batch freezer?
Clean the product-contact path after every production shift, and clean between flavour changes and after any allergen. A weekly deep clean handles removable gaskets, spouts, seals, vents, and drainage areas. High-volume shops or shops using dairy, nuts, and strong flavours may need deeper checks sooner.
What temperature should the wash water be?
Use potable wash water at 43 degrees C or hotter with a food-safe detergent unless the label says otherwise. If you sanitise with hot water, general food-code practice is 77 degrees C for at least 30 seconds. Chemical sanitising uses the label concentration and contact time.
Can I use household bleach?
Do not pour household bleach into a sink and guess the dose. Use a food-contact sanitizer at label concentration; chlorine is commonly used at 50-100 ppm with at least 10 seconds contact, but local code and test strips decide. Never mix bleach with acid or ammonia cleaners.
Do I need to sanitise between two batches of the same flavour?
A full clean is not always practical between identical batches, so follow the manufacturer and local food code. However, wash-rinse-sanitise the product-contact parts after an allergen, a flavour change, a long pause, or any doubt. A purge is not a replacement for cleaning.
How do I stop mint flavour carrying into vanilla?
Remove and clean the spout, gasket groove, dasher hub, rear seal area, vents, and lid underside. Keep dedicated gaskets or small parts for allergens if the machine design allows. If aroma remains after sanitising and drying, repeat the wash step rather than adding more sanitizer.
What should a cleaning log include?
Record the date, shift, bowl number, cleaning step, sanitizer concentration, contact time, inspector initials, and corrective action. For multi-bowl GLACIO GB-Series machines, log each bowl separately. The log should show that the routine happened, not just that someone ticked a box.
Make the cleaning SOP boring, then enforce it
Write one clear sequence, post it at the machine, and train every shift until the close looks the same on a busy Saturday and a quiet Tuesday. The most useful SOP is not the longest document. It is the one that makes a tired closer brush the gasket groove, test the sanitizer, air dry the spout, and sign the bowl number without being reminded.
Start with the machine you own. If you are choosing or expanding a hard ice cream or gelato machine, the GLACIO GB-Series offers 1 to 6 six-liter bowls, with a typical cycle of 15-20 minutes per bowl and roughly 14 liters per hour per bowl under consistent conditions. Request a machine recommendation and quote so the bowl count, cleaning routine, and production flow fit your shop.
What is the one hidden part your team keeps finding residue on after a close?
Some information may be outdated
Comments
Questions about equipment capacity, voltage, or recipes? Leave a comment.
Loading comments...